C3 Smart User Guide


Download C3 Smart
1) Search the App store (iOS devices) or Google Play Store (Android devices) for C3 Smart2) Once located and installed, launch the C3 Smart application.
Note: You may be prompted during set up to provide the application special permissions, please accept this pop up.
Getting Started
1) From the home page either select Sign In (if you have used this application before), or Sign Up and create a new account.
2) If you are creating a new account complete the registration form when prompted. We recommended that you make sure Backup on Cloud is selected.
3) You will then receive an email to your registered email address with a validation code. This will need to be typed into the application before you can continue. If you have not done so already turn on Bluetooth on your device.
Note: Make sure during registration that your password has a minimum of 8 characters, 1 number and 1 capital letter.


Adding a lock
1) From your home page select the + logo in the top right hand corner.
2) When prompted enter your lock's model also known as a DIN (CL4510 or CL5510) and name the lock.
Note: The lock DIN is case-sensitive.
Note: If you are adding a CL5520 please use CL5510 as the lock DIN.
3) Straight away you will need put the lock into startup mode using the below sequence, a ‘•’ equates to a short blue flash.
Setup sequence: #Master Code • 00 • 1 ••
4) This will synchronise the application to the lock and you will then be taken back to the home page where you can view your new lock.


Adding a Client
1) Go to the Clients logo at the bottom of the application and then select + to add a new client.
2) Next you need to choose what type of client they are going to be - phone, card or code.

Phone
1) The person you would like to add as a phone client will need to download C3 Smart and register before you can complete this.
2) Once they are registered and you have entered their email (case sensitive) into the client page, a notification will go through to them with the option to accept or reject.

Card
1) Select Card and then use the arrow in the top right hand corner to go to the next page and choose the lock you would like to associate the card with.
2) In the next page you can set the access type, times and days that you would like to give to this client access for.
3) Next select Setup Lock and wait for the lock to set up (you will hear a beep).
4) Once the set up has completed, touch the card to the lock, this will then pair the card and lock together.
Optional: Press Sync client's info to synchronise the clients information from this page rather than synchronising from the lock page.

Code
1) Select code, then the top right hand corner arrow and select the desired lock.
2) Just like the card feature, you can now set up the client’s access permissions.
3) Then enter the client's name and also create a 4-digit code in the bottom box, then select Add.
4) Lastly go back to the home page of the application, swipe left on the lock and select Sync.

Client Parameters
1) To change the client’s active periods go to the client page and swipe left on the lock in question, then select info and Active Periods.
2) From this page you can set up to 10 pre-scheduled access periods.
Example: The screenshot below will allow access for the following periods:
Wednesday - 10:15 to Midnight
Saturday and Sunday - All day

NetCode Clients
A NetCode client is a code that will only work from a specific date & time and for a set duration.
1) Swipe left on the lock from the application’s home page and open Info. Then go to the locks parameters and then open Features and settings.
2) Make sure the trigger next to NetCode is green. If it is not, turn it on and synchronise your application before continuing.
3) Go to the client page and select the + symbol to create a new client, select the lock you would like them to have access to and then select NetCode.
Note: NetCode clients do not appear in the client list.
4) Set the time and date you require the NetCode to permit access for.
Note: For a 1 hour NetCode, leave the Duration Day as 0 and set Duration Hour as 1.
5) For Type select either All Time, which will allow the NetCode to be used multiple times within the allocated time period, or One Time which will only allow the NetCode to be used once.
6) Select Generate to create your NetCode.
7) From this notification you can chose to dismiss the NetCode or share it via email, SMS etc.
Note: The * symbol must be used when entering NetCodes into locks.


NetCode Lock Settings
You can find NetCode settings in the lock’s settings under Parameters.
1) Netcode Mode - This allows you to select the type of NetCode you would like to use on your lock. Only the selected mode will work in the lock (Only NetCodes are affected by this).
- Standard Multiple Use = Standard multiple use code
- Standard Single Use = Standard one use code
- URM (Unlimited Rental Mode) = Rental with unlimited access
- ACC (Accommodation) = Rental 1 – 21 days
2) Block NetCode User - Enter a NetCode in here when you need to revoke their access.
3) New Blocks Previous - Tick this option if you would like the previous NetCode’s access to be revoked when a new NetCode is used.
4) NetCode Grace Period - This allows you to set a grace period on either end of the allocated access timeslot which will still allow access.

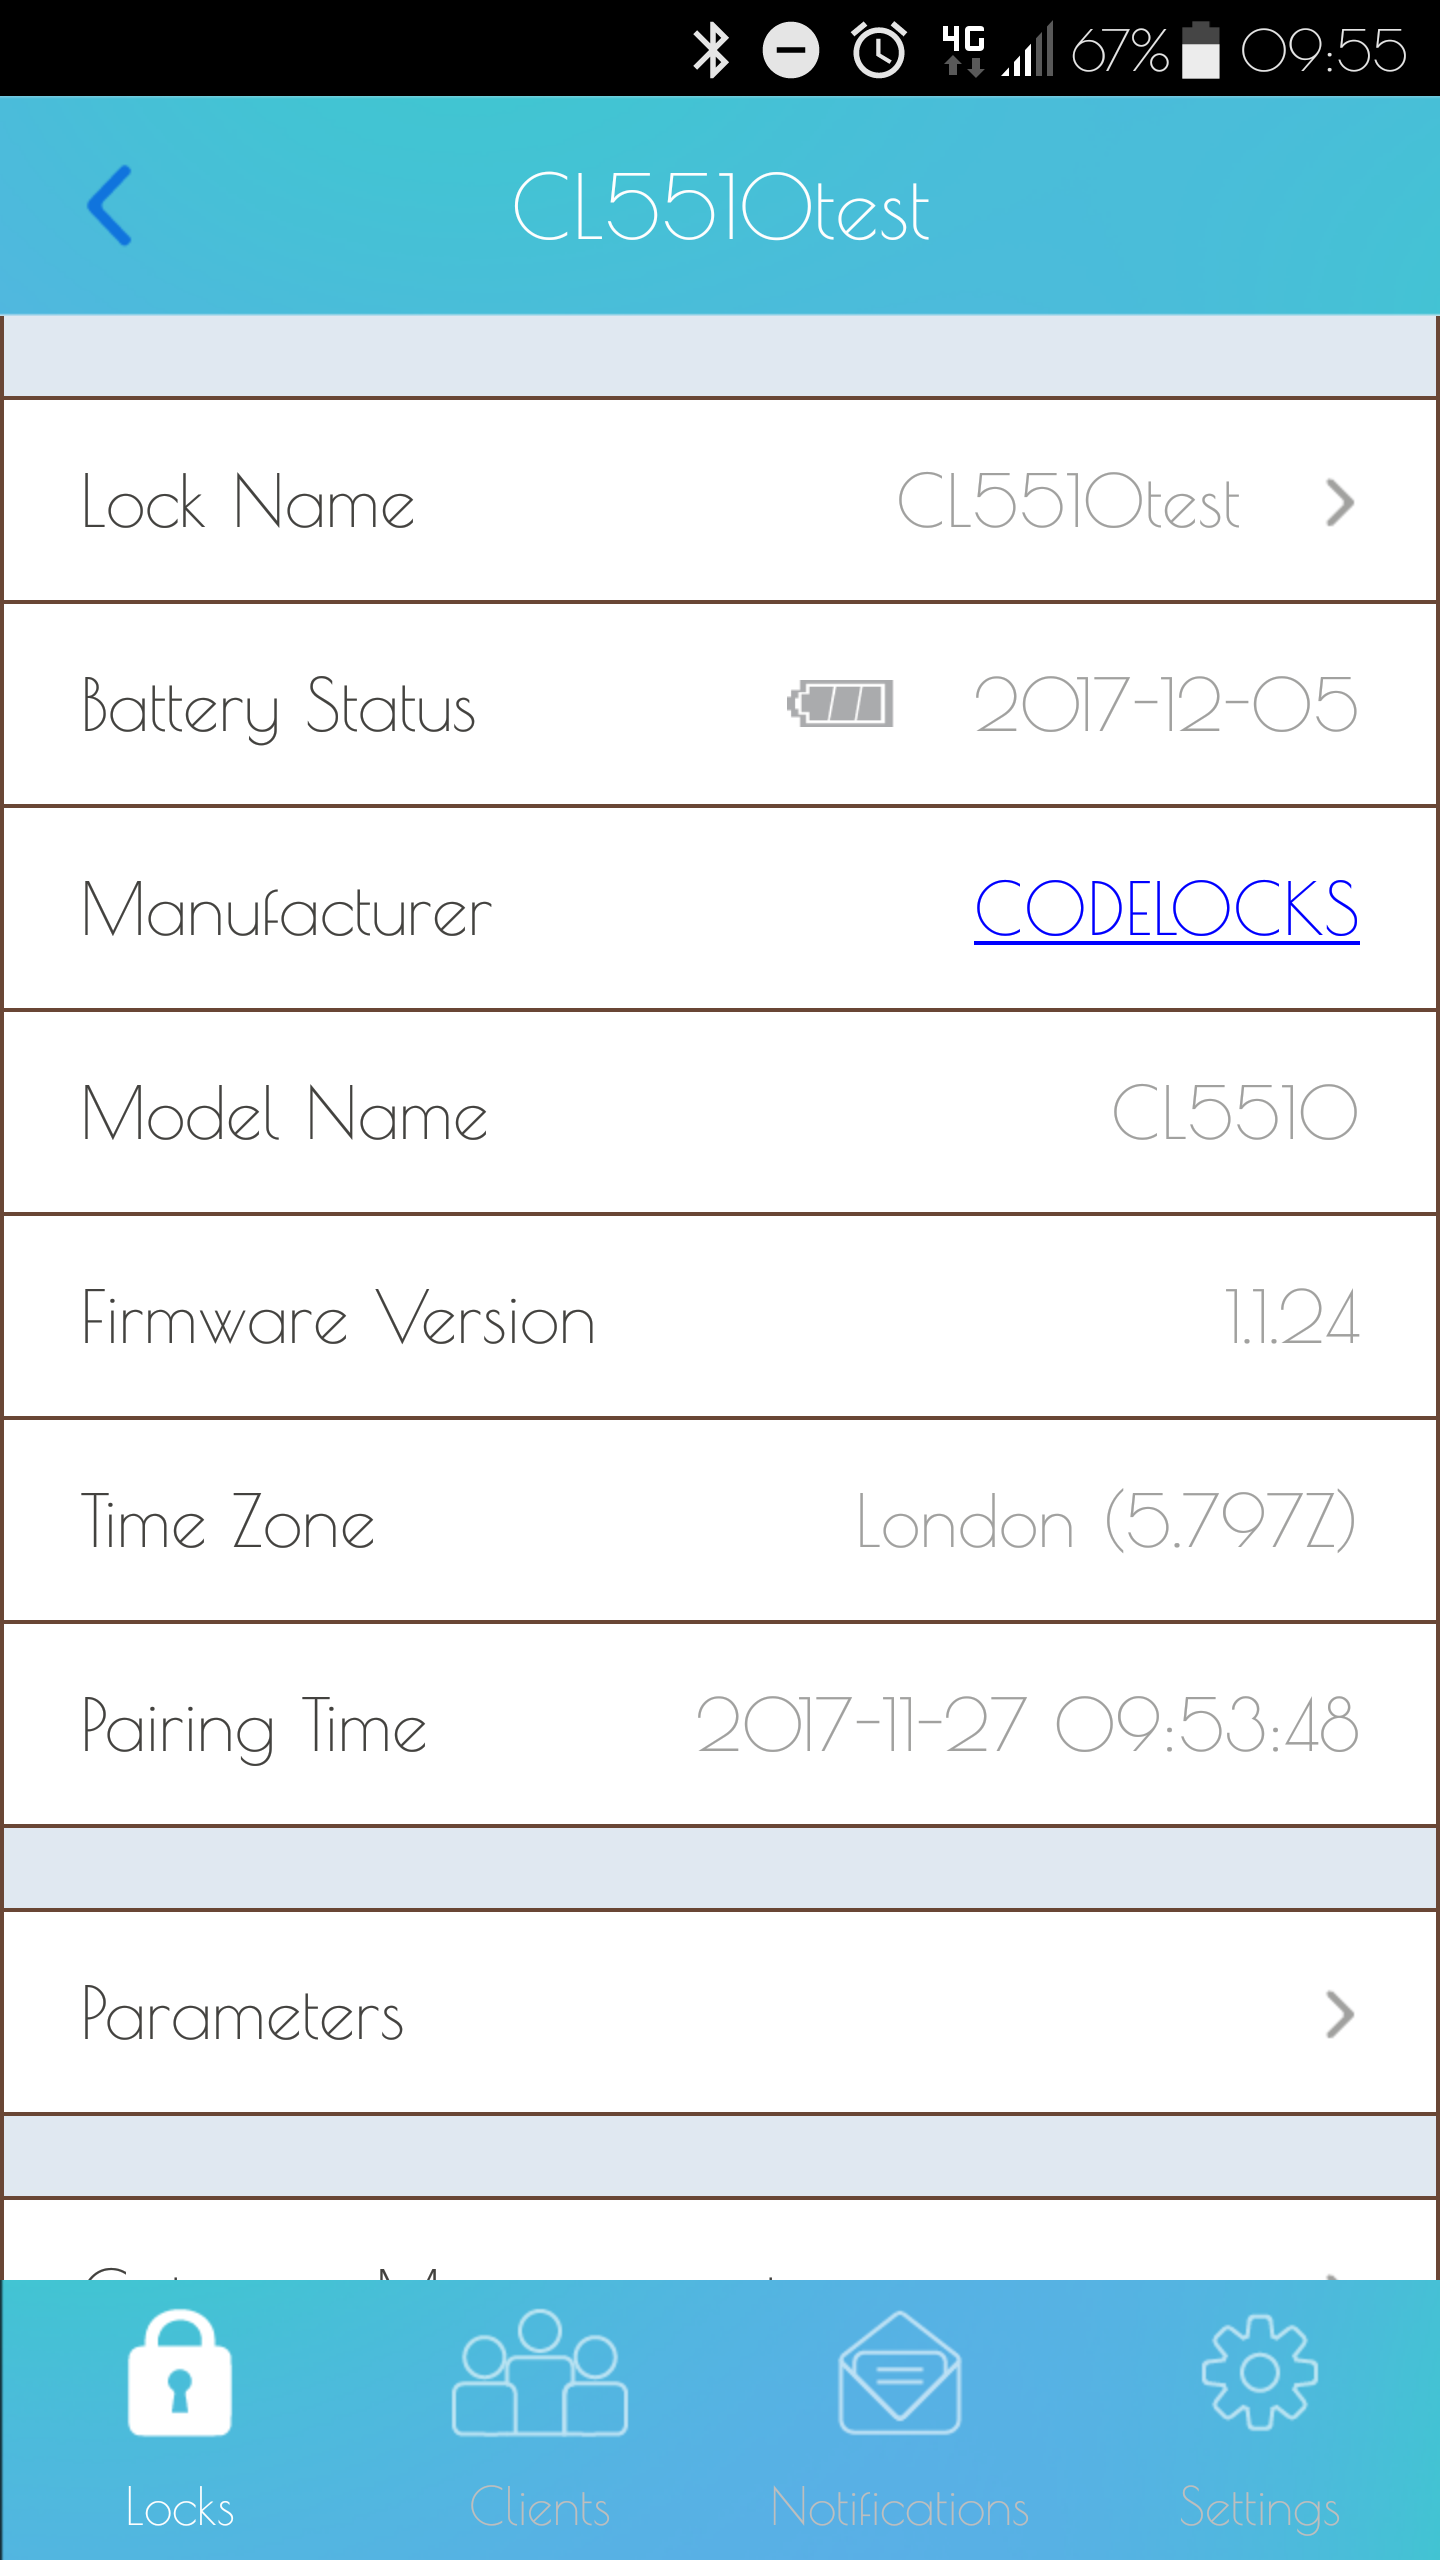
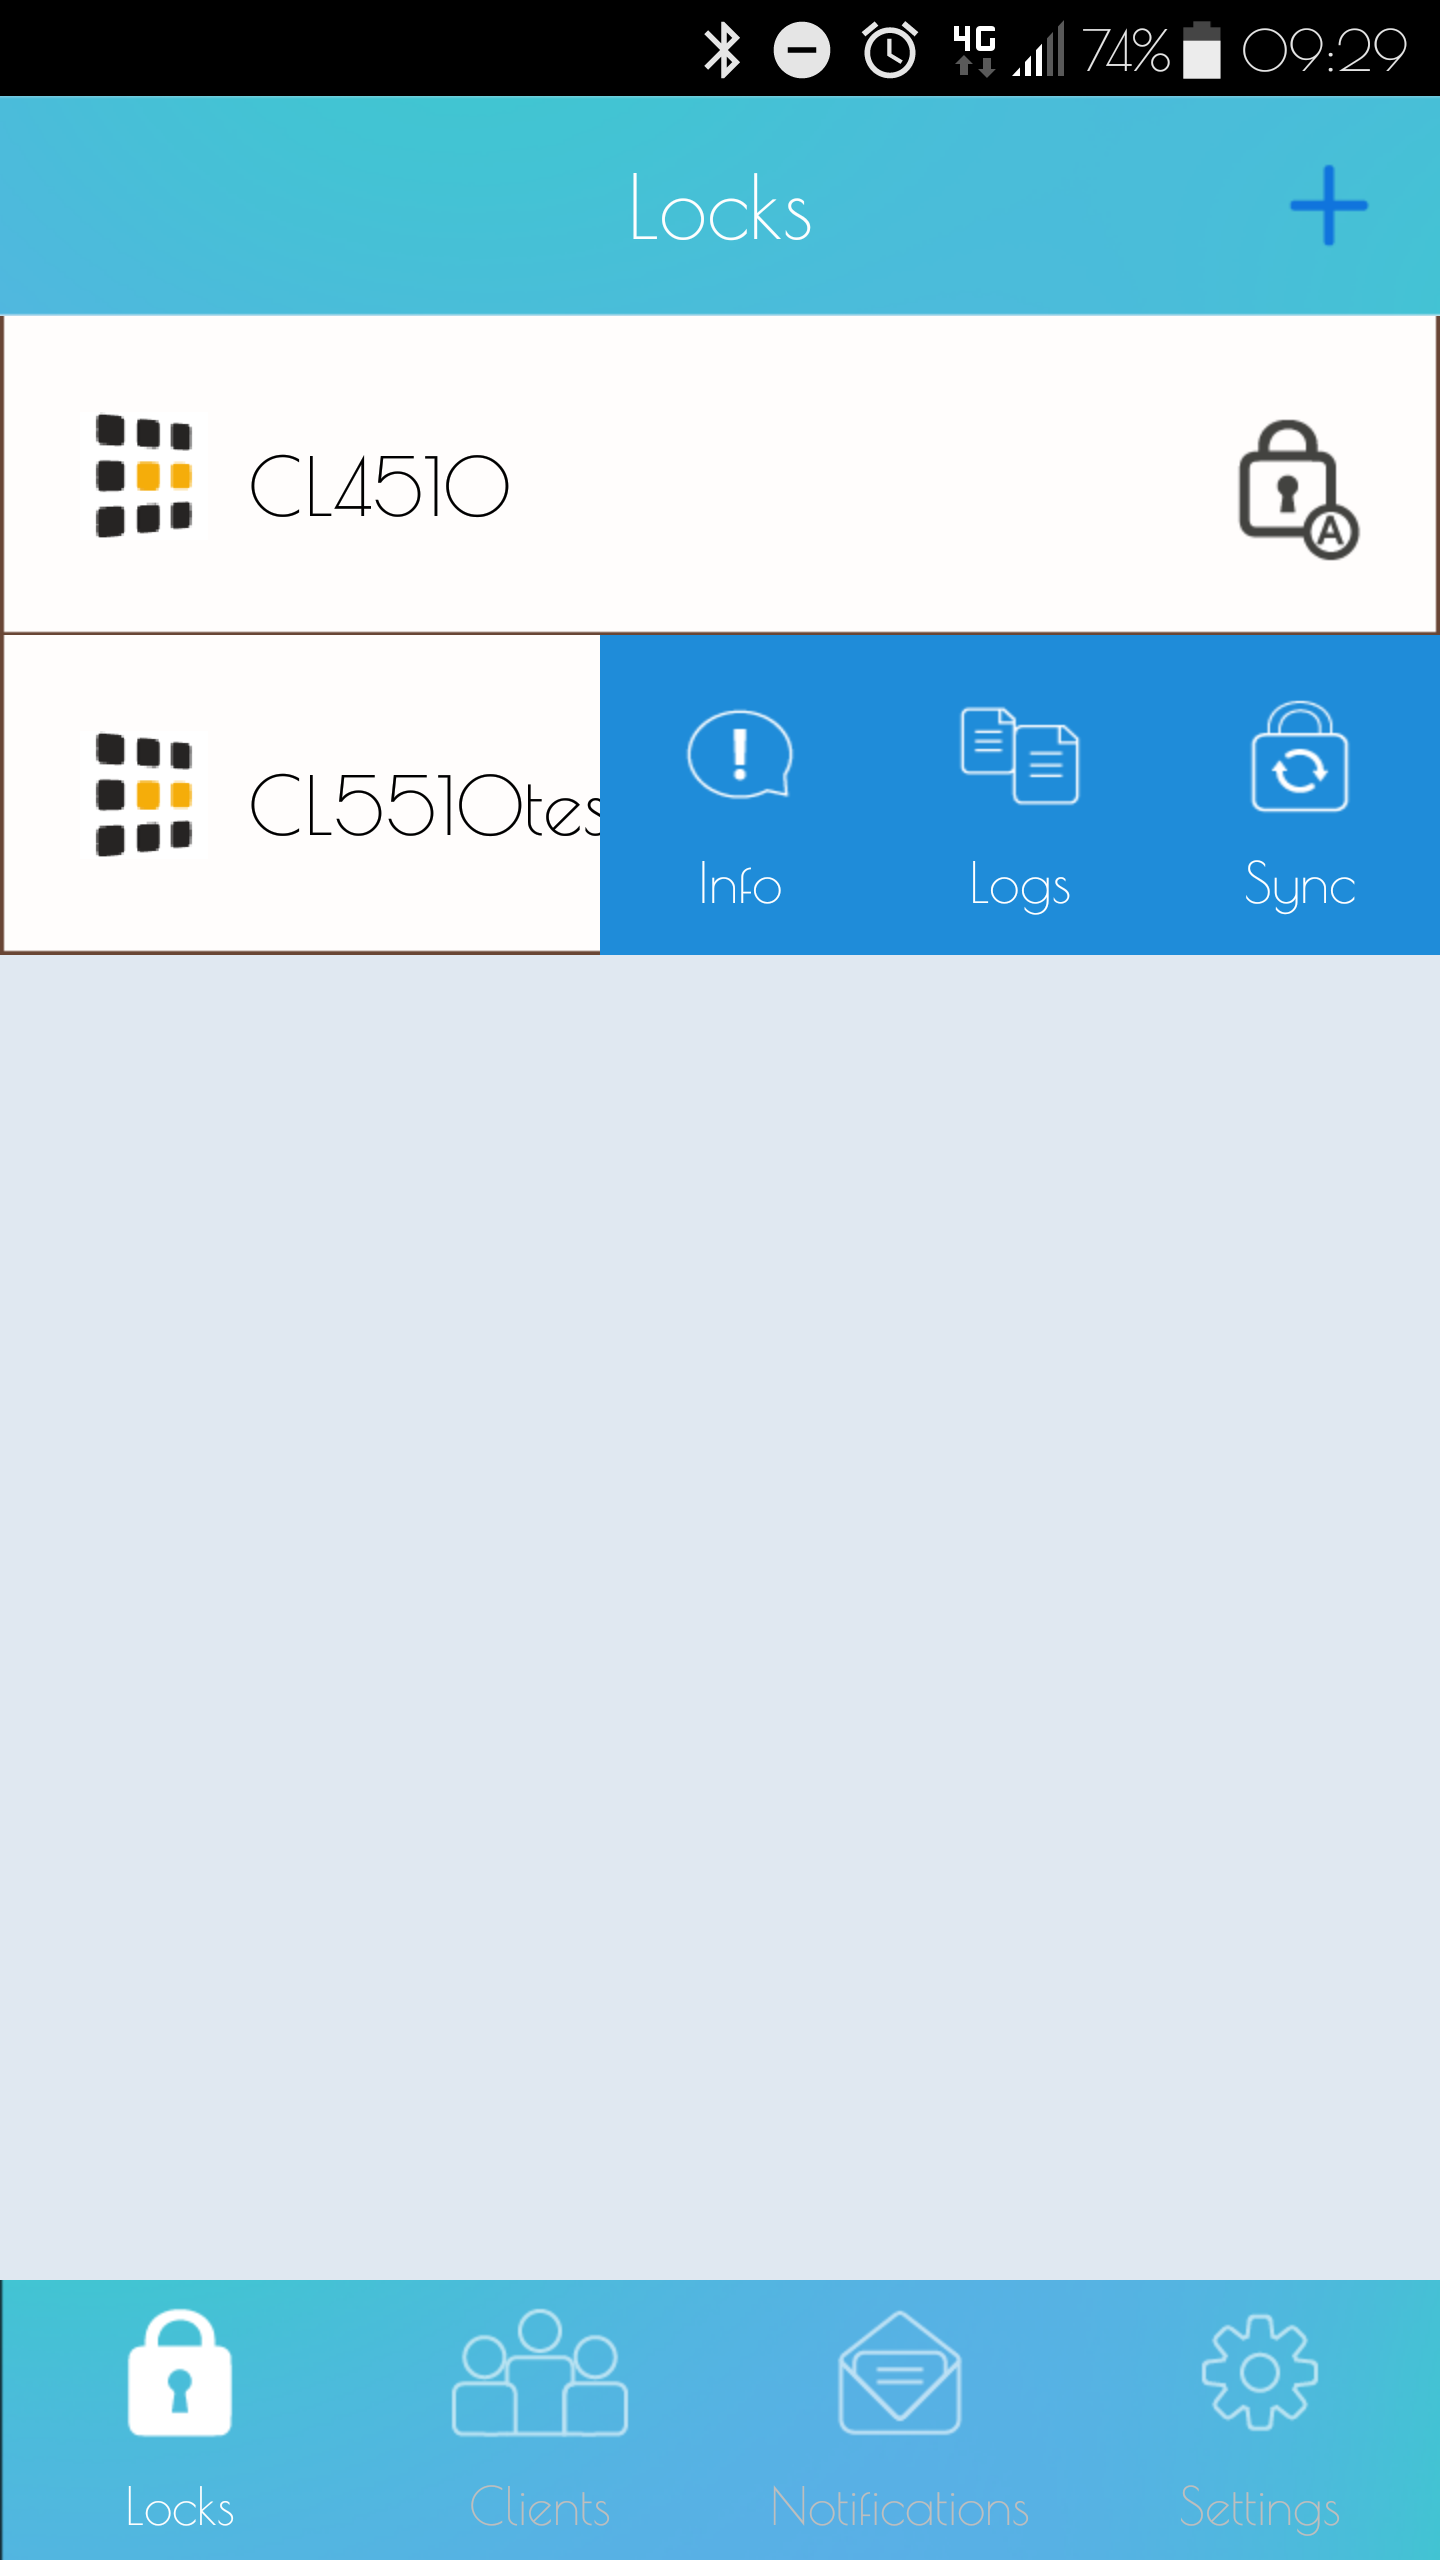
Lock Information
1) Swipe left on the lock from the application’s home page and open Info. You will then be presented with the lock’s information.
a) Parameters - Features and settings available for this lock (see next page for more detail).
b) Lock name - Change your lock’s name.
c) Delete Lock - Delete this lock from the application, this does not carry out a factory reset on the lock.
d) Gateway management - This feature is no longer supported, please do not use.
Logs
1) Swipe left on the lock from the application’s home page and open logs. In this page you can see all the actions which have been taken out on this lock including:
- Unlocking
- Access Denied
- Client Added
- Client Deleted
- Initial Pairing
2) To export this information to an excel formatted file select the Share logo in the top right hand corner. You will then be prompted for how you would like to share this information varying on the options on your device.
Note: For up to date logs a synchronisation must be completed first.

Synchronisation
1) Make sure you are within range of the lock (up to 10 meters line of sight).
2) Swipe left on the lock from the application’s home page and select Sync to carry out a synchronisation.
3) This needs to be carried out for most changes completed in the application for them to implement correctly into the lock.
Note: The lock’s name will appear red when a synchronisation is required.
Lock Features and Parameters
Lock Cloning
1) Set the parameters you would like to clone on a lock, then carry out a synchronisation.
Note: Parameters can only be cloned to the same model lock, for example a CL4510’s parameters cannot be copied onto a CL5510.
2) Go to the parameters page of the lock that you will be cloning them onto.
3) Tap on Clone Lock and then select the lock you are importing from.

4) All updated parameters will turn red and a synchronisation will be needed to implement the changes. Both locks will now have the exact same parameters.
Note: It is not possible to clone NetCodes, Phone, Card or Code clients.
Master and Sub-Master Codes
1) Your default Master Code is #12345678.
2) Select Change Master Code or Change Sub-Master Code to change the code in question.
3) Enter your new code, select the tick button in the top right hand corner and then synchronize the application.
Note: It is imperative that you change this as soon as possible to your own Master Code for security reasons.
Lock Down
This feature will put the lock into lock down mode and will prevent access to anyone except for the master and sub-master codes.
1) Tick the box next to this feature.
2) Synchronize the application.
Code Free
1) Code Free mode will allow you to set the lock to automatically unlock at pre-set times. Up to 10 different Code Free modes can be pre-set.
2) Turn on the Code Free mode by selecting the tab button on the left hand side. Then set your Code Free times and days using the options to the right.
3) You can also activate and suspend all Code Free modes simultaneously by selecting the Actions button. Suspending all Code-Free Modes will revert the lock to normal operation (locked).
Note: A permitted Code-Free Mode will override a non-permitted Code-Free Mode.

Emergency Open Cancellation
When the REM 2 input has been triggered (see page 10), the lock will remain open for 30 minutes. This setting will revert the lock to normal operation.
1) Select Emergency Open Cancellation and wait for the writing to turn red.
2) Synchronise the application.
Re-lock Delay
Use this setting to set how long the lock will remain unlocked for after someone has successfully gained access.
1) Open Relock Delay, select Relock-Delay (secs) and scroll up/down to select a length of time between 2 and 30 seconds.
2) Tap the tick in the top right hand corner
3) Synchronise your application.
Feature Selection
1) This section will allow you to select which type of access’ are allowed for this lock.
2) Make sure all desired access types have the trigger selected next to them.
3) Synchronize your application.
Note: There is more information relating to NetCodes on page 6.
GuestCode
This feature allows you to create a prefix which you can give to a guest, they can then use this prefix to create their own code at a later time.
1) Change GuestCode Prefix - The 3 digit code that you enter into this section will need to be given to the guest.
2) Synchronize your application.
3) The guest can now go to the look and enter the prefix followed by 4 digits of their choice. Once they have done this they will hear two confirmation beeps.
Example sequence: 1235678 •• (Prefix is set to 123, guest wants to set their GuestCode as 5678)
3) Delete Guestcode Prefix and User - This will wipe the prefix as well as the GuestCode so the guest cannot use the prefix to set up another GuestCode.
4) Delete GuestCode User - This will retain the prefix but delete the GuestCode.
Day Lock Out
Use this setting to prevent access to the lock for all clients (card, code, phone) in a set time period.
1) Select Day Lock Out.
2) Set the start time and end time for the access to be prevented. Then select which dates of the week this needs to take place.
3) Finally, press the tick in the top right hand corner to accept your changes and then synchronise your application.
Keypad Illumination
In this option you can select when you would like the keypad to light up.
- None - The keypad will not display any LED lights
- Press - The keypad will only light up when a button is pressed.
- Proximity - The keypad will light up when it senses movement close to it.
Note: Synchronise your application to implement your changes, battery life will be reduced if keypad illumination is turned on.
Locked/Unlocked Status LED
If this option is selected the lock will flash every 5 seconds, red for locked, blue for unlocked.
Note: Synchronise your application to implement your changes, battery life will be reduced if status LED is turned on.
Daylight Saving
Please make sure that Use Recommended Settings is selected in this section.
Note: The only exception to this is if your location does not observe daylight savings.
REM Behaviour
The CL4510 and CL5510 include two connectors called REM ports. The standard behaviour of these ports allows reception desk remote opening (REM 1) and alarm panel trigger opening (REM 2).
These ports have four different modes of operation you can choose from:
1) Remote Release - In this mode REM1 is used for standard push-button release. REM2 is intended to be used when the lock needs to be released for a longer period. When a switch or relay connected to REM2 is closed, the lock will open for a period of 30 minutes, after which the lock will revert back to normal operation.
2) Sensor Mode - This mode allows two dry contact switches or sensors (door status and latch monitoring) to be connected. Trigger entry will also be added to the audit trail.
3) Sensor and Alert - This is a hybrid mode combining the support for a single dry contact switch or sensor (as per sensor mode) and an output. The output can be connected to any compatible device, such as CCTV, with an input that supports the detection of a falling (changing) voltage.
4) Unlock and Lock Down - This mode supports the connection of two dry contact switches. Connected to REM1, the switch will unlock the lock for the period set by the standard re-lock delay. Connected to REM2, the switch will trigger lock-down mode (Only the Master and Sub-Master Code will be able to gain access).
If you have changed your mode, remember to synchronise your application.
Mute
Turn on this feature to mute the lock. Please note that when this feature is turned on the lock will flash yellow when buttons are pressed.
Note: Synchronise your application to implement the change.
Note: Synchronise your application to implement the change.
Settings
User Info
You can change your account details, configure your cloud backup and manage your access key in this section.
Change Account Details
1) From the settings page, select User Info.
2) Touch Change Password to change your account password. Please note you will need to know the current password to carry out this amendment.
3) To change your username simply select User Name, input the revised name and tap on the tick in the top right hand corner to save the changes.
Cloud Backup
This can be enabled or disabled via the switch next to Backup on Cloud. You can also perform a live backup by selecting Backup to Cloud Now.
Access Key
The access key is required to link your C3 Smart locks with your NetCode Portal account, to generate your key click on Access Key and then select Generate New Access Key.
If a new access key is generated the link with the NetCode Portal will be 'broken', remove and re-add the locks to the portal with the newly generated access key.
Note: The access key is case sensitive.
Legal Info
In this section you are able to view all the application’s legal documentation:
- Terms of Services
- Privacy Policy
- Open Source Licences
IFTTT Maker Channel
This is currently not an active feature and therefore cannot be used.
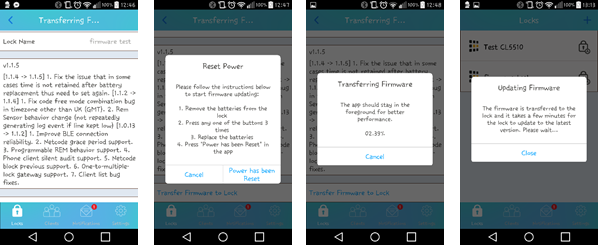
Firmware Updates
1) Open the C3 Smart App.
2) Swipe left on the lock and then select the Info section for the lock you would like to update.
3) Select Firmware Version.
4) If new firmware is available for your lock, the Firmware Upgrade screen will open and show you the update’s details.
5) Scroll down and touch Transfer Firmware to Lock.
6) You may then be prompted to restart the lock's power and will be asked to put the lock into setup mode.
Setup sequence: #Master Code • 00 • 1 • •
7) The upgrade process will take up to 5 minutes. Please ensure you do not move outside of the range of the lock (approximately 10 meters line of sight) or close the application.
Regulatory Compliance
The device complies with Part 15 of the FCC Rules. Operation is subject to the following two conditions: (1) This device may not cause harmful interference, and (2) This device must accept any interference received, including interference that may cause undesired operation.
This equipment has been tested and found to comply with the limits for a Class B digital device, pursuant to Part 15 of the FCC Rules. These limits are designed to provide reasonable protection against harmful interference in a residential installation. This equipment generates, uses, and can radiate radio frequency energy and, if not installed and used in accordance with the instructions, may cause harmful interference to radio communications. However, there is no guarantee that interference will not occur in a particular installation. If this equipment does cause harmful interference to radio or television reception, which can be determined by turning the equipment off and on, the user is encouraged to try to correct the interference by one or more of the following measures:
• Reorient or relocate the receiving antenna.
• Increase the separation between the equipment and receiver.
• Connect the equipment into an outlet on a circuit different from that to which the receiver is connected.
• Consult the dealer or an experienced radio/TV technician for help.
© 2019 Codelocks Ltd. All rights reserved.
Related Articles
WiFi Gateway Getting Started Guide
Notice: The C3 Smart App replaced the K3 Connect App on February 14, 2023. For more information on how to download, set up and use C3 Smart with your Codelocks Smart Locks, visit: c3smart.net or contact Codelocks Support. Introduction The WiFi ...C3 Smart User Guide
Notice: The C3 Smart App replaced the K3 Connect App on February 14, 2023. For more information on how to download, set up and use C3 Smart with your Codelocks Smart Locks, visit: c3smart.net or contact Codelocks Support. Download C3 Smart 1. Search ...C3 Smart User Guide
Notice: The C3 Smart App replaced the K3 Connect App on February 14, 2023. For more information on how to download, set up and use C3 Smart with your Codelocks Smart Locks, visit: c3smart.net or contact Codelocks Support. Download C3 Smart 1. Search ...C3 Smart User Guide
Notice: The C3 Smart App replaced the K3 Connect App on February 14, 2023. For more information on how to download, set up and use C3 Smart with your Codelocks Smart Locks, visit: c3smart.net or contact Codelocks Support. Download C3 Smart 1. Search ...KL1100 RFID - Getting Started Guide
ABOUT KL11OO The KL1100 can operate in Standalone Mode. This Getting Started Guide contains the instructions to enable you to quickly program your lock in Standalone Mode. THE BASICS Penalty Time Presenting an unregistered card 3 times will incur a ...